
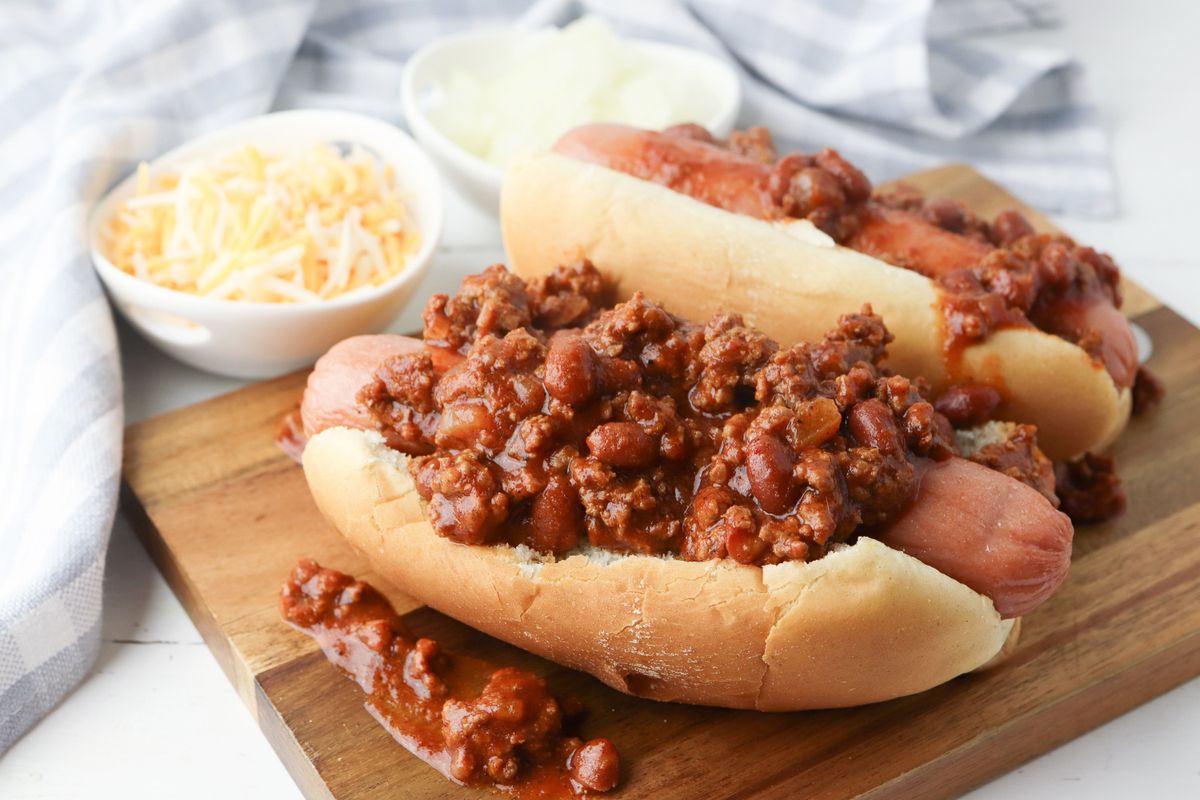
Transform your regular hot dogs into a mouthwatering delight with this hearty hot dog chili recipe. Perfect for a casual family dinner or a game day treat, this chili adds a rich, flavorful topping that will elevate your hot dog experience. Simple to make and packed with robust flavors, it's sure to become a favorite.
Most of the ingredients in this recipe are common pantry staples. However, if you don't usually cook with ground cumin or chili powder, you might need to pick these up at the supermarket. They are essential for giving the chili its distinctive, spicy flavor. Additionally, make sure you have kidney beans on hand, as they add a hearty texture to the dish.
Ingredients For Hot Dog Chili Recipe
Ground beef: Provides the meaty base for the chili.
Tomato sauce: Adds a rich, tangy flavor and helps to create the sauce.
Kidney beans: Adds texture and heartiness to the chili.
Onion: Adds sweetness and depth of flavor.
Garlic: Enhances the overall flavor with its aromatic qualities.
Chili powder: Brings heat and a complex, spicy flavor.
Ground cumin: Adds a warm, earthy flavor that complements the chili powder.
Salt: Enhances all the other flavors in the dish.
Black pepper: Adds a mild heat and depth to the chili.
Technique Tip for This Recipe
To enhance the flavor of your ground beef, consider browning it in batches. This allows the meat to sear properly, developing a rich, caramelized crust. Avoid overcrowding the pot, as this can cause the beef to steam rather than brown. Once browned, drain any excess fat to keep your chili from becoming greasy. When adding the onion and garlic, cook them until the onion is translucent and the garlic is fragrant, which will add depth to the overall flavor. Finally, let the chili simmer for at least 20 minutes to allow the spices to meld together, creating a more cohesive and flavorful dish.
Suggested Side Dishes
Alternative Ingredients
ground beef - Substitute with ground turkey: Ground turkey is a leaner option and provides a similar texture and flavor profile.
tomato sauce - Substitute with crushed tomatoes: Crushed tomatoes offer a chunkier texture and a fresher tomato flavor.
kidney beans - Substitute with black beans: Black beans have a similar texture and can add a slightly different but complementary flavor.
chopped onion - Substitute with shallots: Shallots provide a milder and slightly sweeter flavor compared to onions.
minced garlic - Substitute with garlic powder: Garlic powder can be used in a pinch and offers a similar garlicky flavor.
chili powder - Substitute with paprika and cayenne pepper: A mix of paprika and cayenne pepper can mimic the heat and depth of chili powder.
ground cumin - Substitute with ground coriander: Ground coriander has a citrusy and slightly sweet flavor that can complement the dish.
salt - Substitute with soy sauce: Soy sauce adds saltiness along with a depth of umami flavor.
black pepper - Substitute with white pepper: White pepper provides a similar heat but with a slightly different flavor profile.
Other Alternative Recipes Similar to This Chili
How to Store / Freeze Your Chili
- Allow the chili to cool completely before storing. This helps prevent condensation, which can lead to a watery texture.
- Transfer the cooled chili into airtight containers or heavy-duty freezer bags. For easy portioning, consider using smaller containers or dividing the chili into individual servings.
- Label each container or bag with the date and contents. This ensures you know exactly what it is and when it was stored.
- Store the chili in the refrigerator if you plan to use it within the next 3-4 days. For longer storage, place the containers or bags in the freezer.
- When freezing, lay the bags flat on a baking sheet until solid. This makes them easier to stack and saves space in the freezer.
- To reheat, thaw the chili in the refrigerator overnight if frozen. For a quicker option, use the defrost setting on your microwave.
- Reheat the chili on the stovetop over medium heat, stirring occasionally, until it reaches your desired temperature. You can also reheat it in the microwave, stirring every minute to ensure even heating.
- If the chili appears too thick after reheating, add a splash of water or broth to reach the desired consistency.
- Enjoy your reheated chili over hot dogs, baked potatoes, or even nachos for a delicious and convenient meal.
How to Reheat Leftovers
Stovetop Method:
- Place the leftover hot dog chili in a saucepan over medium heat.
- Stir occasionally to ensure even heating.
- Add a splash of water or broth if the chili appears too thick.
- Heat until the chili is warmed through, approximately 5-10 minutes.
Microwave Method:
- Transfer the hot dog chili to a microwave-safe bowl.
- Cover the bowl with a microwave-safe lid or plastic wrap, leaving a small vent.
- Heat on high for 1-2 minutes, then stir.
- Continue heating in 30-second intervals, stirring between each, until the chili is hot.
Oven Method:
- Preheat your oven to 350°F (175°C).
- Place the hot dog chili in an oven-safe dish.
- Cover the dish with aluminum foil to prevent drying out.
- Bake for 20-25 minutes, or until the chili is heated through.
Slow Cooker Method:
- Transfer the hot dog chili to your slow cooker.
- Set the slow cooker to low heat.
- Heat for 1-2 hours, stirring occasionally, until the chili is thoroughly warmed.
Double Boiler Method:
- Fill the bottom pot of a double boiler with water and bring it to a simmer.
- Place the hot dog chili in the top pot.
- Stir occasionally, heating until the chili is hot, approximately 10-15 minutes.
Best Tools for This Recipe
Large pot: Essential for cooking the ground beef and combining all the ingredients. It provides enough space for the chili to simmer and develop its flavors.
Wooden spoon: Useful for stirring the ingredients together and ensuring they are well mixed without scratching the pot.
Knife: Needed for chopping the onion and mincing the garlic.
Cutting board: Provides a safe and clean surface for chopping the onion and mincing the garlic.
Measuring spoons: Necessary for accurately measuring the chili powder, ground cumin, salt, and black pepper.
Can opener: Required for opening the cans of tomato sauce and kidney beans.
Colander: Used to drain and rinse the kidney beans before adding them to the pot.
Spatula: Helps in breaking up the ground beef while it cooks to ensure even browning.
Ladle: Ideal for serving the chili over hot dogs or into bowls.
How to Save Time on Making This Chili
Pre-cook the beef: Cook the ground beef ahead of time and store it in the fridge. This way, you can skip the first step when you're ready to make the chili.
Use pre-chopped onions: Buy pre-chopped onions from the store to save time on prep work.
Minced garlic paste: Use store-bought minced garlic paste instead of mincing fresh cloves.
Canned beans: Opt for canned kidney beans to avoid the lengthy process of soaking and cooking dried beans.
One-pot cooking: Use a single large pot for the entire recipe to minimize cleanup time.
Hot Dog Chili Recipe
Ingredients
Main Ingredients
- 1 lb Ground Beef
- 1 can Tomato Sauce (15 oz)
- 1 can Kidney Beans (15 oz, drained and rinsed)
- 1 medium Onion chopped
- 2 cloves Garlic minced
- 2 tablespoon Chili Powder
- 1 teaspoon Ground Cumin
- 1 teaspoon Salt
- ½ teaspoon Black Pepper
Instructions
- 1. In a large pot, cook the ground beef over medium heat until browned. Drain any excess fat.
- 2. Add the chopped onion and minced garlic to the pot. Cook until the onion is translucent.
- 3. Stir in the tomato sauce, kidney beans, chili powder, ground cumin, salt, and black pepper.
- 4. Bring the mixture to a boil, then reduce the heat and let it simmer for about 20 minutes, stirring occasionally.
- 5. Serve the chili over hot dogs or as desired.
Nutritional Value
Keywords
Suggested Appetizers and Desserts for This Chili
More Amazing Recipes to Try 🙂
- German Pancakes Recipe30 Minutes
- Fideo Recipe30 Minutes
- Hash Browns Recipe25 Minutes
- Dirty Martini Recipe5 Minutes
- Strawberry Jam Recipe30 Minutes
- Hot Toddy Recipe10 Minutes
- Onigiri Japanese Rice Balls Recipe40 Minutes
- Baked Haddock Recipe30 Minutes
Leave a Reply